We’re excited to introduce a new feature in the Email Builder designed to streamline your attribution analysis and improve campaign performance tracking!
💥 Problem Statement
Previously, adding UTM parameters to links in email campaigns was a manual, error-prone process. This could be tedious and time-consuming, leading to inconsistencies and potential mistakes.
😎 What We Did
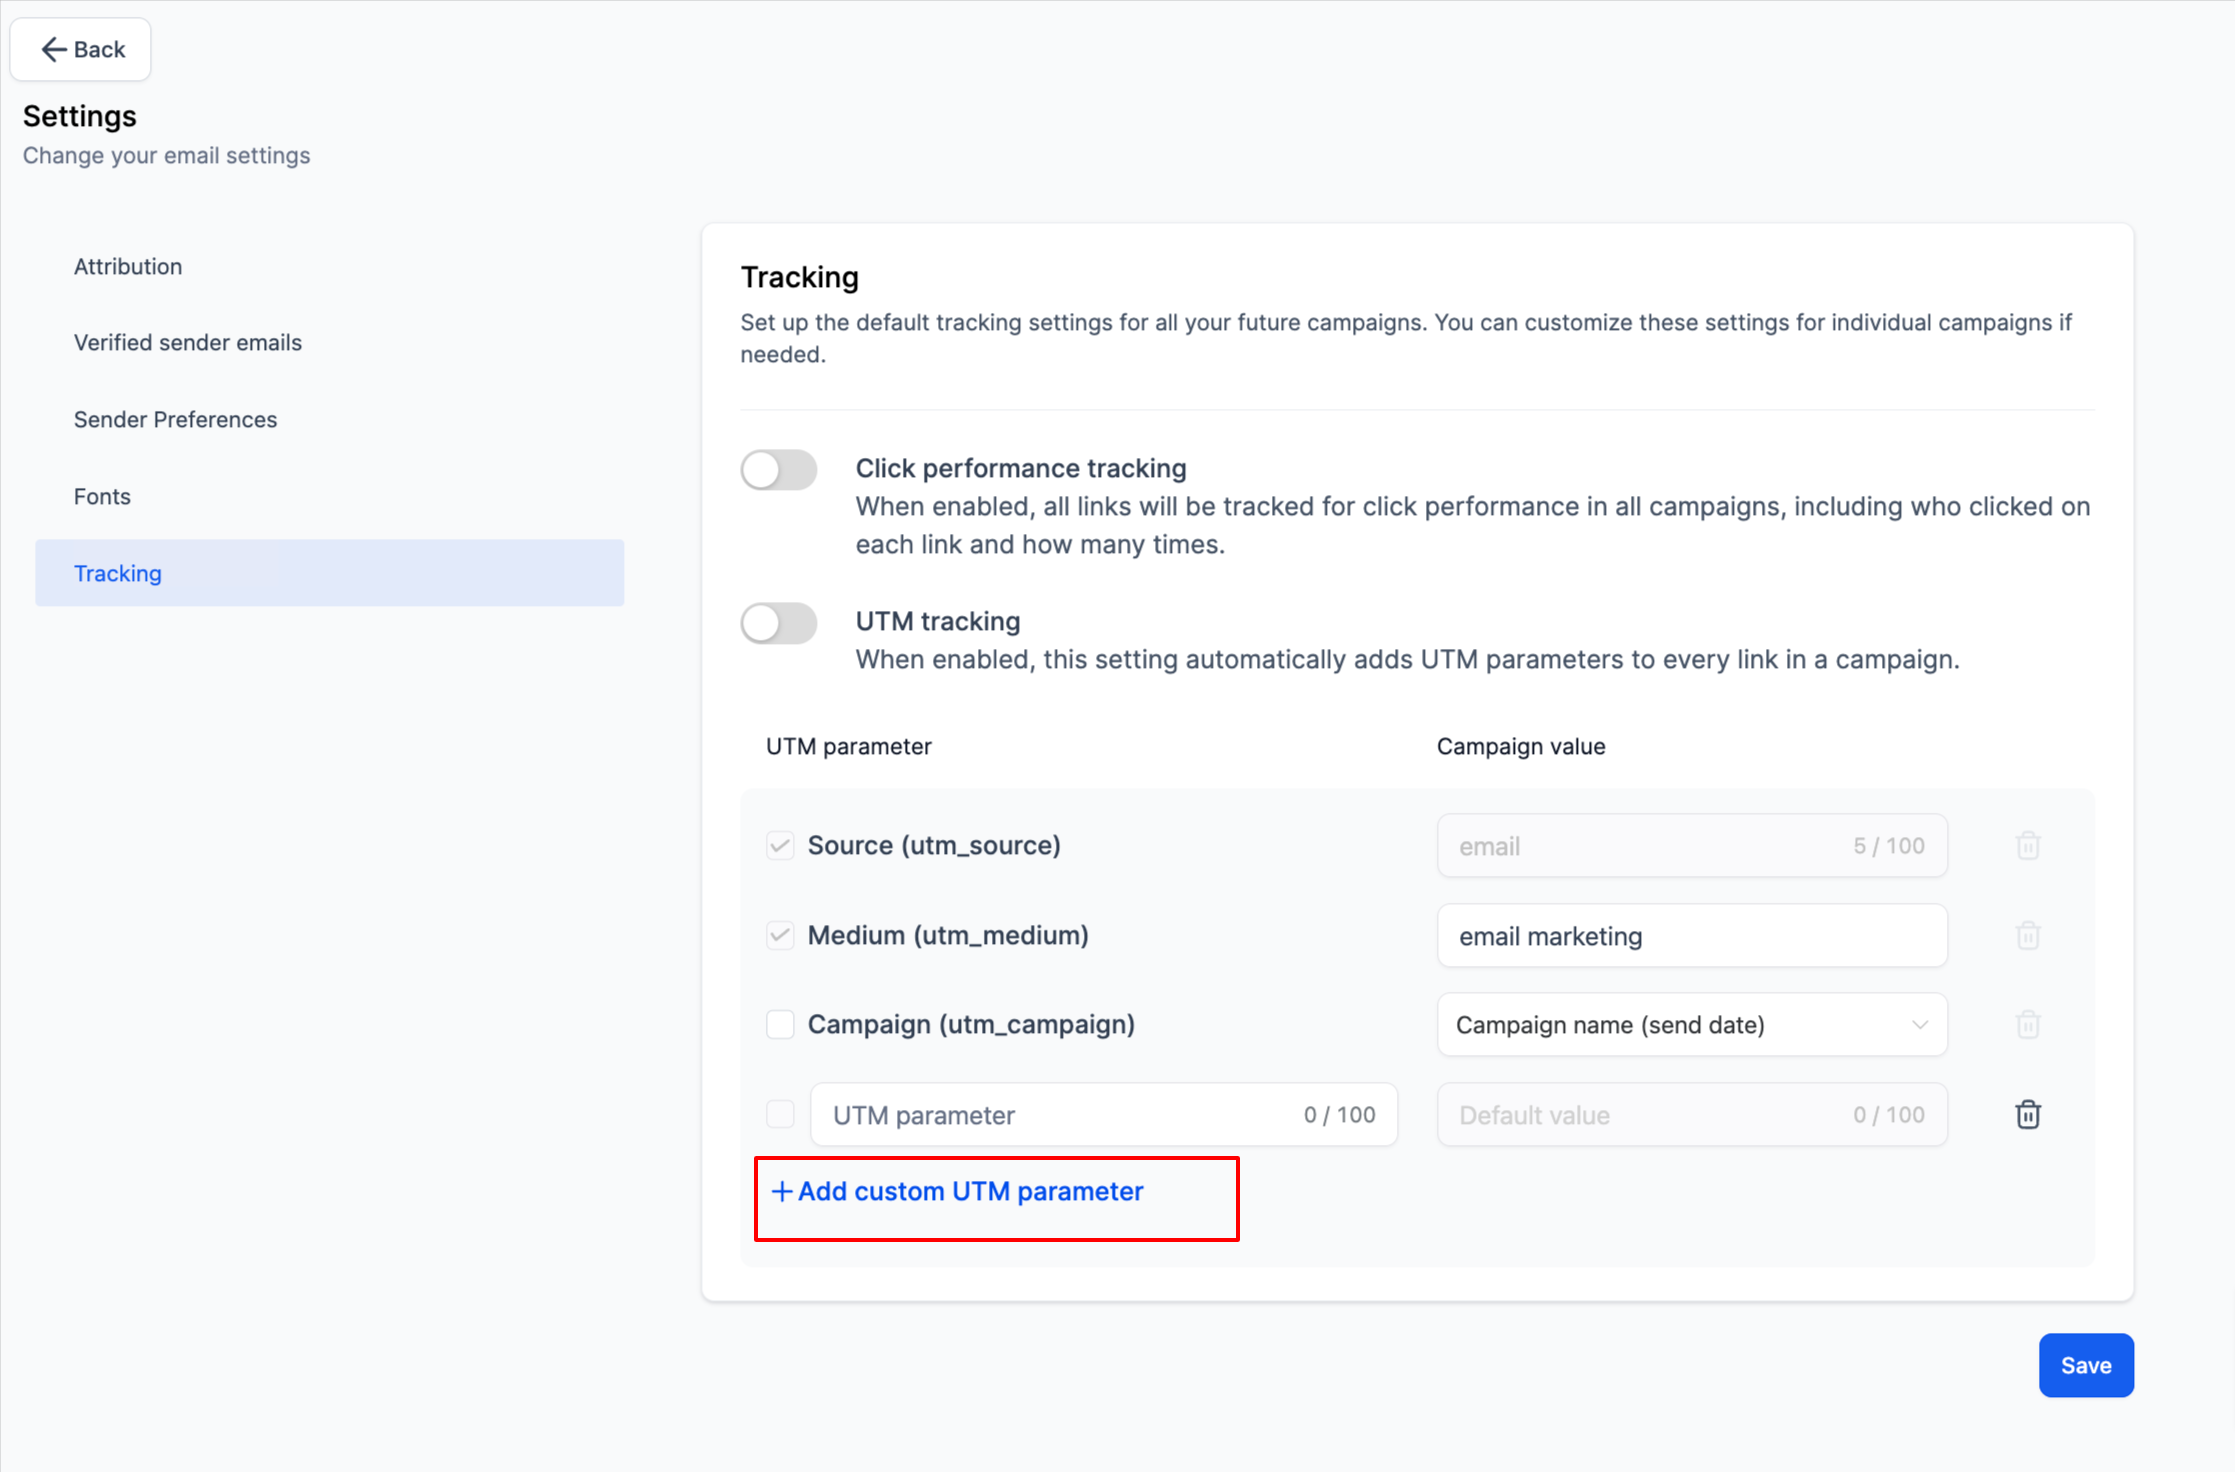
You can now set default UTM parameters in the Email Builder settings, automatically applying them to all your campaigns. You also have the option to disable UTM tracking for specific campaigns if needed.
💃 Benefits
- Easier Management: Automatically apply UTM parameters without manual edits.
- Better Analysis: Gain clearer insights into campaign performance and impact on traffic and conversions.
🤩 How to Use UTM Parameters
- Navigate to Email Marketing: Access the Email Marketing section of your platform.
- Access Settings: Click on the Settings page under Email Campaign.
- Review Tracking Options: Select the Tracking option to view and adjust the default UTM parameters.

- Enable Default UTM Parameters: Toggle the switch to apply UTM parameters by default to all campaigns.
- Edit Default Values: Adjust the values for utm_medium or utm_campaign as needed.
- Add Custom Parameters: Click on Add Custom Parameter to include additional parameters and their values.
- Select Parameters: Check the boxes for the UTM parameters you want to add to your campaigns.
- Save Changes: Click Save to apply your updated settings.
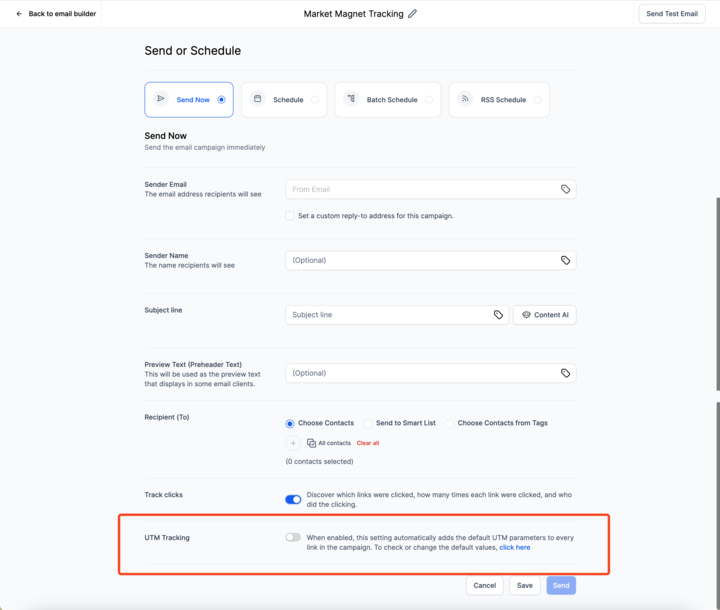
- Disable for Specific Campaigns: To exclude UTM parameters from a specific campaign, turn off tracking on the Send or Schedule page.

This update aims to make campaign management more efficient and provide better insights into your email marketing efforts. Enjoy the new capabilities!
